Installation
This covers installing nodes onto Minecraft server. There is some manual file copying required, so this is more involved than just dragging in plugins.
Requirements
Minecraft 1.16.5
- Paper server for 1.16.5 https://papermc.io/api/v2/projects/paper/versions/1.16.5/builds/794/downloads/paper-1.16.5-794.jar
- Java 16
Plugin Requirements
- Dynmap-3.3.2: To display nodes map. Must be >=3.3.
- kotlin-runtime: Runtime for kotlin used for nodes.
- nodes: Nodes.
- nodes-ports: Nodes ports addon.
- Essentials: Nodes has hooks to essentials.
- ProtocolLib: Requirement for nodes.
Installation Steps
-
Run paper server so
plugins/folder is created. -
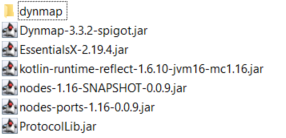
Drag in
*.jarplugins first and run server so initial config folders are generated. -
Do a dynmap render of the world first. Run server and type in server console,
dynmap fullrender [world], where[world]is your world name inserver.properties. -
Dynmap file patching:
4.1. Make sure you have a dynmap rendered with a world border like picture above.
4.2. Drag thedynmap/folder in the .zip intoplugins/so that it overwrites the built-in dynmap files contained inplugins/dynmap/. -
Nodes dynmap verification:
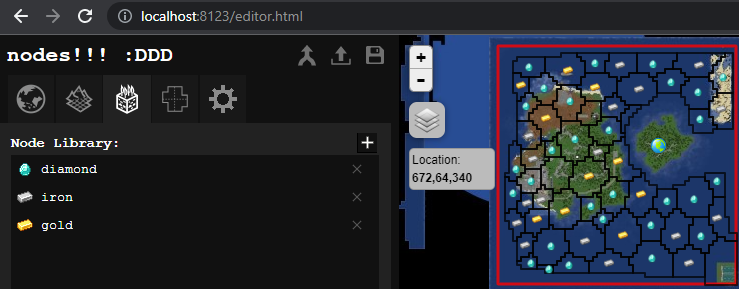
5.1. Keep paper server running so dynmap is running. Open a web browser and go to your local nodes editor at http://localhost:8123/editor.html.
5.2. Paint some nodes in map editor and downloadworld.jsonusing download button in the top-right of editor panel.
5.3. Putworld.jsonintoplugins/nodes/world.json
5.4. Restart server.
5.5. Reload http://localhost:8123/editor.html page and see to check if nodes are visible like below.
-
Nodes server verification: just type
nodesin the server console to print nodes world info. The number of territories and resources should match the map. -
Configure
plugins/nodes/config.yml
Default New Nodes .html Pages
The dynmap patches create the following html pages:
- http://localhost:8123/nodes.html: This shows only the 1st tab of the full nodes editor (world overview).
- http://localhost:8123/editor.html: This provides server manager
a local editor to paint nodes on dynmap view of the world.
This is all client side, no changes here affect the server.
Updating server world requires saving the
world.jsonand placing it in the serverplugins/nodes/world.jsonand reloading. - http://localhost:8123/empty.html: Same as editor, but world is empty, so you can paint a fresh new map.
You can copy paste these to create new web pages as needed.
If you want to replace the default dynmap page, copy the
nodes.html into a new index.html.
Nginx Dynmap Server (Optional)
Dynmap is notorious for being performance drag on servers. Since nodes does not rely on dynmap for nodes rendering, you do not actually need dynmap beyond generating the terrain image tiles. Drawback is not having dynmap to see players online or real-time map terrain updates. Summary of process is:
- Use dynmap to generate terrain image tiles
- Disable dynmap
- Use nginx to serve dynmap image tiles and the nodes javascript + world (rendering is all client side).
- Turn on dynmap whenever re-rendering world is needed.
TODO
https://github.com/webbukkit/dynmap/wiki/External-Webserver-Basics
https://github.com/webbukkit/dynmap/wiki/Dynmap-with-Nginx